Showing posts with label costume. Show all posts

Transforming Cinderella Dress

Thursday, May 21, 2015

So I just wanted to post this GIF of the transforming Cinderella dress I made for an elementary school production. I am very proud of it! 


It was amazing how little information I could find on the internet about trick dresses like this, I guess you don't reveal your secrets! Anyway, I used magnets at the shoulder and side seams. The dress is all one piece, sewn together in strategic layers. It was quite an adventure and it worked really well, I think! 

-Madame T

Dressing the Tudor Lady

Sunday, December 28, 2014

I'm working on actual projects, really I am, but meanwhile I'd like to post a piece I did as a Christmas present for a friend. 


Hopefully you can click to enlarge it, and if you have trouble, here is the image on my DeviantART.

This was a lot of fun to make, and hopefully I will be able to get a tutorial about how I did the fabric overlay out soon!

-Madame Taylor

The Margaery Tyrell Costume

Thursday, November 27, 2014

This semester's masterpiece: I recreated one of Lady Margaery Tyrell's costumes from Game of Thrones.
She wears this ensemble in the episode "Valar Morghulis" and repeats the vest and skirt with a different scarf and no sleeves in a following episode. She also wears a similar vest made of a different fabric in a previous episode. So, generally a fairly representative Margaery costume!

Here was my main reference image:

And my version of it!

This costume was a labor of love, let me tell you! Here is some info about the different pieces of it.

Skirt: I dyed six yards of 55" white rayon challis, using Evening Blue, Teal, and Taupe RIT dyes. I cut two almost half-circles (I was conserving fabric so I could make the blue scarf for another time) with a waist circumference slightly bigger than mine. I added a thin waistband and even thinner ties, let it hang overnight, and hemmed. This skirt is based on the one from a different one of her dresses, but I wanted to make them interchangeable so I can do other Margaery costumes in the future. 

It's soooo twirly!

Bodice: Again, dyed with those three RIT colors after much swatching. This started out as a white denim. I draped the pattern based on the photo and it underwent MANY alterations. I also draped an interlining pattern (which also served as the lining pattern) and cut the interlining out of a hideous polka-dot denim. There is zip-tie boning in the interlining. The embroidery is all by hand, sketched out based on the photo. I made up the back embroidery based on the front! It fastens at the center with a skirt hook and bar, with a tie to cover it. All the edges are hand-finished. 

Here's a picture of what I did on the back in case that helps anyone out:


Scarf: I already had this fabric (it was an old curtain) which is one reason I ended up making this costume. It was a sign! It's just two thin rectangles, French-seamed in the middle and hemmed on all sides.

Sleeves: I'm not happy with them, honestly! I wanted to use brown elastic cord to "lace" them up but I couldn't find any in time, so they are just tapered bias tubes with elastic at the top. They fall down all the time and I kind of hate them. But they serve their purpose, I suppose.  


I wear it with a rose necklace that was an heirloom (another sign that I needed to make a Margaery costume) and silver ballet flats. In that scene where Margaery visits the orphanage, we see one of her handmaidens lift up her skirt to step over a puddle, and the maid is wearing a ballet-flat kind of shoe, so I figured that was plausible. I've never seen Margaery's shoes.

Probably one of my favorite pictures:


And, finally, I had the camera on continuous shot so I made a GIF of me twirling: 

-Madame Taylor


Tan Stays- Finished and Sold!

Sunday, July 28, 2013

Every time I do a project, I tell myself, "This is the one that I'm going to take pictures of its whole process!" And then it never happens. Oh well. I've got some pictures of the finished stays though, not laced or on a person but finished nonetheless.


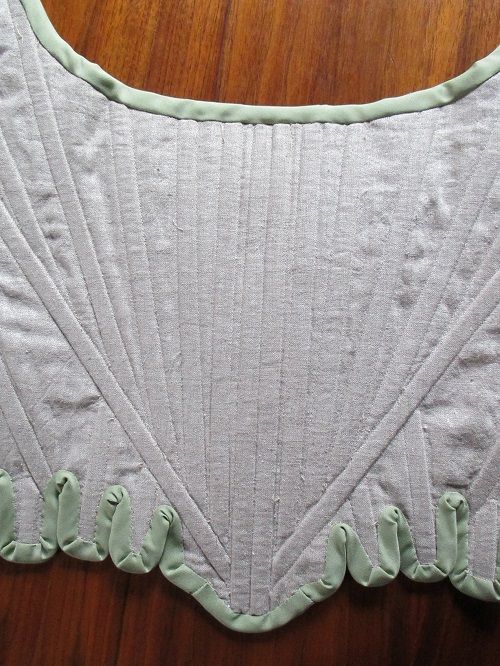
Here's the front view! I hadn't done the strap eyelets at this point, but they are otherwise finished.
All the boning channels are machine-sewn. On about 75% of them, I had to rip out one line of stitching and re-sew it, because I'd made them too small! It was really frustrating but I made it work. My advice here is, when you're drawing your boning channels, they've got to be a bit bigger than the boning itself! 


Here is the front again, laid out like they would be worn. 


And the back.


The inside with its muslin lining. I put in the lining after doing the boning channels and putting the panels together, but before doing eyelets and binding. Ashley will only be wearing this corset for a few reenactments a year, so I didn't think she'd need a removable lining.


I hand-sewed 23 eyelets. I actually like doing eyelets, they go fairly quickly (about 5 minutes each for me) and they're pretty satisfying when you do them well. I also got a nice awl out of the deal, so that's great!


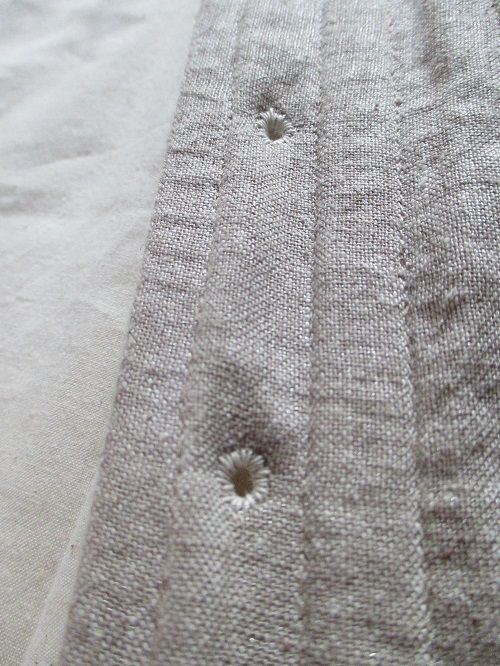
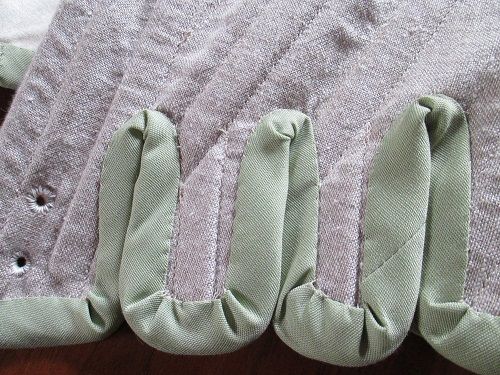
Here's a close-up of my painstaking hand-sewn binding on the tabs! I kept track of my hours on this, and the binding took me almost as long as the entire rest of the corset. Pretty crazy, eh? I watched 3 different PBS programs, 10 Things I Hate About You, and Mean Girls in English and then in French! It was ridiculous. But it looks good! 


Here's a close-up of the front. For the binding on the top edge of the stays, I machine-sewed it to the front and did the inside by hand. My tip is do the bottom binding first because it makes the top binding seem to go so much faster! 


And guess what! This is my first and possibly only entry in the Dreamstress' Historical Sew Fortnightly!


The Challenge: #13 Lace and Lacings
Fabric: The outer fabric is some sort of cotton or linen, I'm not exactly sure, with a bit of a sheen. The inside layers are canvas, and the lining is unbleached muslin. The binding is commercially available bias tape.
Pattern:  The Diderot Stays pattern, which can be found in Norah Waugh's Corsets and Crinolines but which I found on La Couturiere Parisienne. 
Year: This pattern is accurate to the 1760s/1770s.
Notions: LOTS of  tan Dual Duty thread, some heavy duty thread for eyelets, and cable ties for boning. 
How historically accurate is it? Let's see. The fabric is plausibly historical but not perfect; the bias tape has polyester in it so that's a no. Most of the stitching was done by machine with polyester thread. The binding was mostly hand-sewn, and the eyelets were hand-worked. I'm going to say maybe 70% then.
Hours to complete: 24. No joke. I kept track because it was for someone else and that's how I figure out what to charge them. 
First worn: Since this wasn't for me, I'm not sure, but I think she went to try it on right after she paid me, so... July 23 I would guess!
Total cost: I charged $225 for my work, but I actually didn't spend any money on this because Ashley bought the fabrics and notions for me. So I really don't know. 

This was quite an adventure and I'm glad I got to step away from the usual hemming and mending work people pay me for! 

-Madame Taylor


Beginnings of the Tan Stays

Monday, July 15, 2013

I was thrilled to get a commission from someone who does French and Indian War reenactment and wanted some 18th century stays made for her. Of course I jumped at the chance! When most of my summer sewing work is mending, hemming, making pillows, and other tedious tasks, a historical garment, and one I have experience with nonetheless, was a definite yes! 

So, I drafted a pattern based on Ashley's measurements, with help from La Couturiere Parisienne's helpful guide as well as various scans I found online of the Diderot stays from Corsets and Crinolines (the book is on my wishlist for sure). I messed up a bit in the original patterning and thus on my first set of stays as well: I had assumed the side seams on the pattern were in fact side seams, and drafted my pattern thus. After a little reconsideration and wondering why my pattern didn't look like the original, I realized they're about an inch back from being a true side seam! Luckily I had only cut out a mockup thusfar, and luckily it was really easy to simply chop off an inch of the back piece and tape it to the front. 


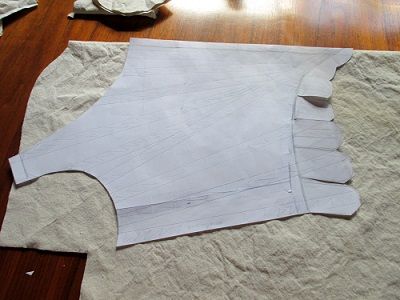
Here is a photo of the front pattern piece lying on the heavy duck fabric that I'm using for the inside layers. I made the front point shorter than usual because Ashley said that her reenactments involve more sitting than standing, and I thought that would be more comfortable for her.


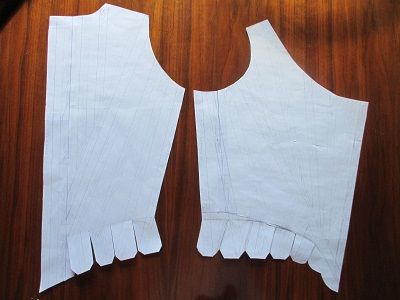
The two pattern pieces side-by-side


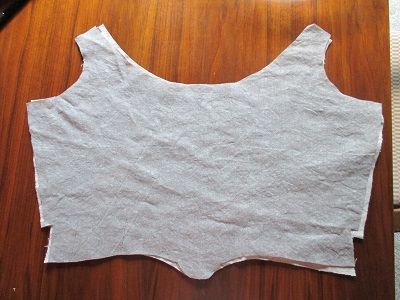
The fronts all layered together


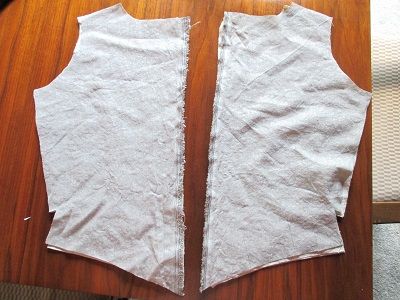
The backs all layered together


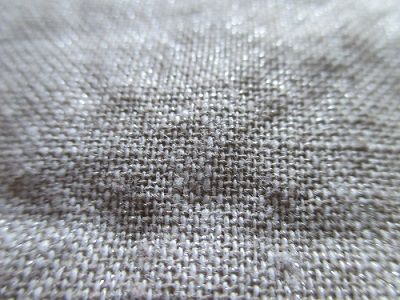
This is my attempt to show off the outer fabric that Ashley picked out. I think it's some sort of rough cotton or possibly linen, but it's got this silvery sheen to it which is quite lovely and quite hard to capture with a camera! (This was also to show off my new camera, which does quite well in natural light especially.)

I already have all the boning channels done but did not have time to take a picture of that yet. The eyelets will be done by hand, as will much of the binding. It is amazing how quickly sewing the boning channels went, compared to doing them by hand! 

This will be my (probably) one and only entry into the Dreamstress' Historical Sew Fortnightly, late I admit, under Lace and Lacing. I will get it done in 2 weeks however, because I'm leaving Vermont next Tuesday! Time for some speed-sewing!

-Madame T

New Additions on Colonial Williamsburg!

Friday, February 24, 2012

The Colonial Williamsburg Museum has added a lot more things to their online collection!


I'm always really excited to see new extant garments! Sadly there is exactly one pair of stays, but there are several gowns and lots of accessories!

Finally: The Finished Stays

Sunday, February 19, 2012

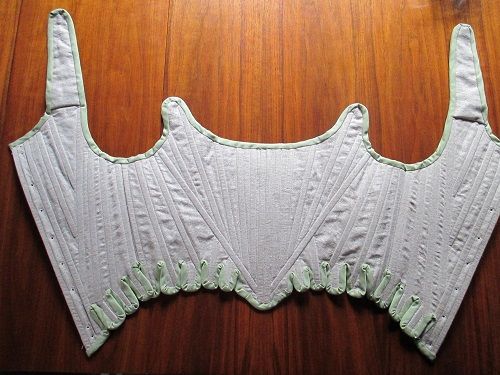
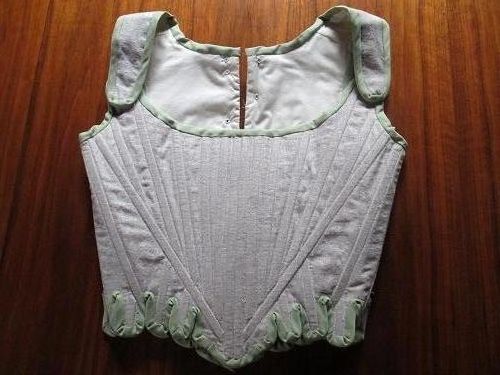
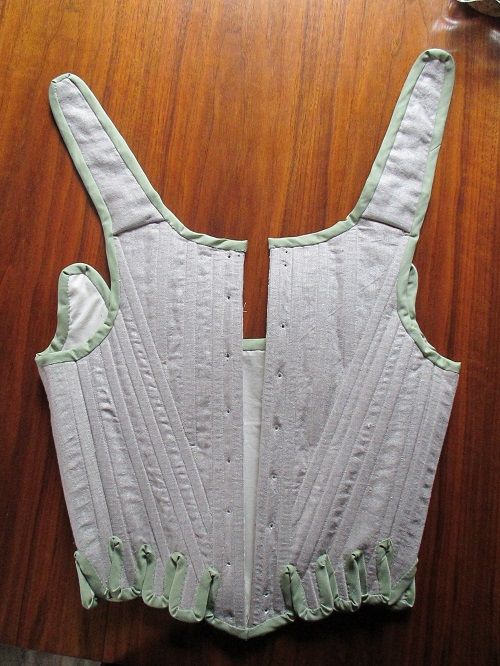
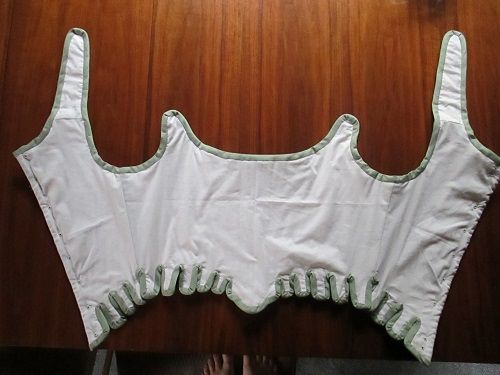
Really they've been finished for months, but we just got a good-enough computer that could have pictures put on it. So without further ado, here are the stays (and a psuedo-historical halloween costume):

my image name

my image name

my image name

my image name

Entirely handsewn, boned with heavy-duty zip ties. Outer layer of some sort of taffeta, middle two layers of linen, inside layer of an old sheet. But what a lovely shape they give me!

The Stays

Friday, October 21, 2011

Actually, I've finished the stays. !!! I knowww!!!! But I haven't taken any pictures of them and I haven't posted these in-progress pics yet so I thought I would. Hopefully I can take some really awesome (read: not iPhone) pictures of them soon.


Here's the front:

Photobucket

And the side. My face was rather derpy so I cropped it.


Photobucket

And the best one of the lot, the back:


Photobucket

Gotta love that spiral lacing. Even if it's a little wonky in these pictures.
I will totally post a real, detailed post about this, I promise.

In other news, I was the lead in Cinderella of Loreland at my school, for which I made this:


Photobucket

It's a goodwill skirt with a bajillion patches added. It was like, freehand patchwork. Took forever. But it was very effective. Obviously that's not the top I wore. Hopefully, more on Cinderella later, too. I also made my ballgown!

-Madame Taylor

Diamonds are Howl's Best Friend

Sunday, August 14, 2011

I've been working on like 5 different projects. Of course the most impressive at the moment is the Howl jacket. I've gotten the diamonds I need sewn on, and now I need to get more grey fabric to finish the outside. Then I'll sew the two layers together including the diamonds. Here's what I've got now:


Also I'm working on a modern adaptation of an 18th century robe a l'anglaise, some 18th century stays and those miniatures still. I should've taken pictures of those things but whatever. Still pretending people actually read this blog...

-Madame Taylor


Howl Jacket, etc.

Monday, August 8, 2011


On Saturday a family friend and fellow Quaker called and told me she had a bunch of sewing stuff and fabric to get rid of and did I want it? OF COURSE I wanted it. So I went over there yesterday. There's some great stuff and some okay stuff and some weird stuff but I totally love it all.


Isn't that white floral on the top just wonderfully 18th century? I want to make a polonaise out of it. But we'll see, I have to make stays and all that first. The ugly orange blocky thing is heavy weight linen. PERFECT for the inner layer of some stays. Not useful for very much else. There is a lot of patterning paper and these cute 70's pattern drafting kits. I love it. Oh, and that Walmart bag of scraps.

And see that white box on the far left? That's filled with yards and yards of handwoven teal silk from Thailand or somewhere. SWOON.


MEANWHILE...
In the spring I got a comment on dA on the Howl's Moving Castle jacket I made last fall. This person wanted me to make her one. I told her that I was busy at the time but she didn't need it until late September. So we've been emailing back and forth and yesterday I started working on Cindy's Howl jacket!

I made the lining first. It's made of the same red poly satin that I used for the first one. I somehow miscalculated and ended up with twice as much as I needed, so I had plenty to make this one with.

Same for the pink front and sleeves, I had plenty left over. So all I have to buy is the grey for the back, and the yellow ribbon edging. Sweet!

Here are the other pieces I've cut out so far. The pink is the front (the sleeves are under), and then there are 12 diamonds and 2 half diamonds. Really I need 18 grey pieces total, but since 6 of them are half-diamonds, I think I might be okay on the diamond front. If not, I have to get more grey anyway so I'll cut out some more.


In other news, school starts on Thursday. I'm still working on the mini 18th century things. Did I mention miniature stays take just as long as their full-size counterparts? Well, I actually wouldn't know, since I haven't made those yet. But I did win a pattern on ebay.

Sorry for the bad pictures. They're from an iPhone.

-Madame Taylor

 
Madame Tailor - by Templates para novo blogger