Showing posts with label commissions. Show all posts

Transforming Cinderella Dress

Thursday, May 21, 2015

So I just wanted to post this GIF of the transforming Cinderella dress I made for an elementary school production. I am very proud of it! 


It was amazing how little information I could find on the internet about trick dresses like this, I guess you don't reveal your secrets! Anyway, I used magnets at the shoulder and side seams. The dress is all one piece, sewn together in strategic layers. It was quite an adventure and it worked really well, I think! 

-Madame T

Tan Stays- Finished and Sold!

Sunday, July 28, 2013

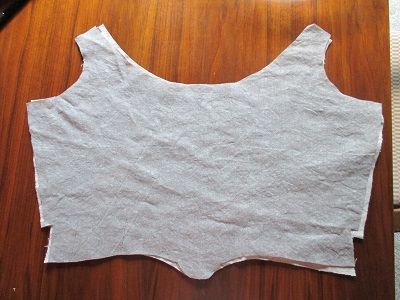
Every time I do a project, I tell myself, "This is the one that I'm going to take pictures of its whole process!" And then it never happens. Oh well. I've got some pictures of the finished stays though, not laced or on a person but finished nonetheless.


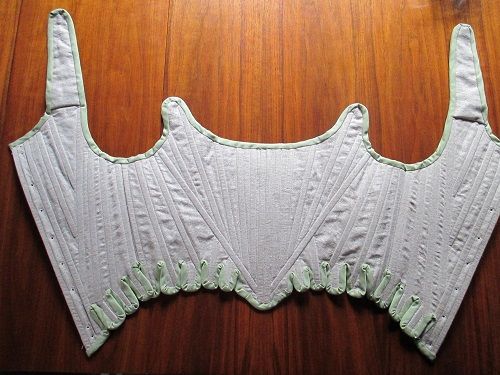
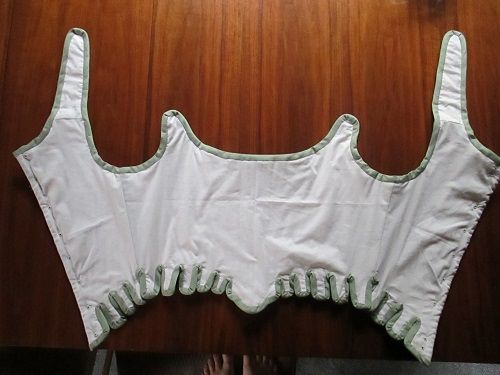
Here's the front view! I hadn't done the strap eyelets at this point, but they are otherwise finished.
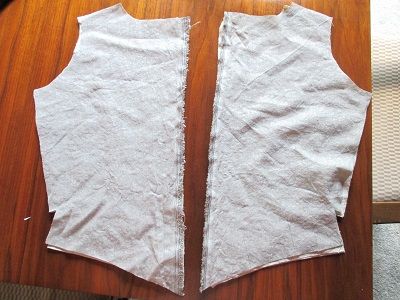
All the boning channels are machine-sewn. On about 75% of them, I had to rip out one line of stitching and re-sew it, because I'd made them too small! It was really frustrating but I made it work. My advice here is, when you're drawing your boning channels, they've got to be a bit bigger than the boning itself! 


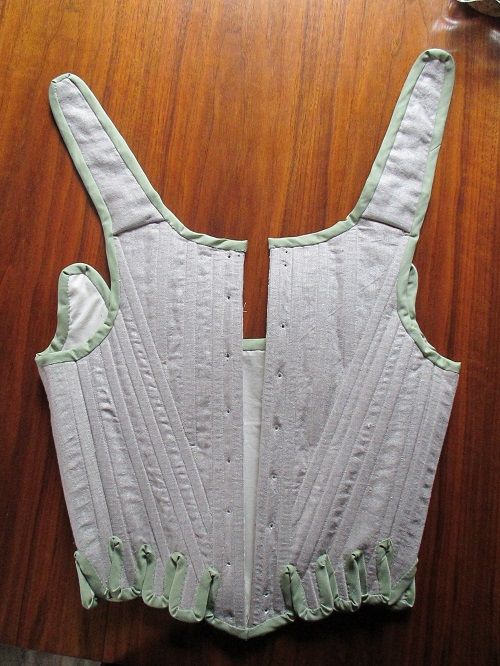
Here is the front again, laid out like they would be worn. 


And the back.


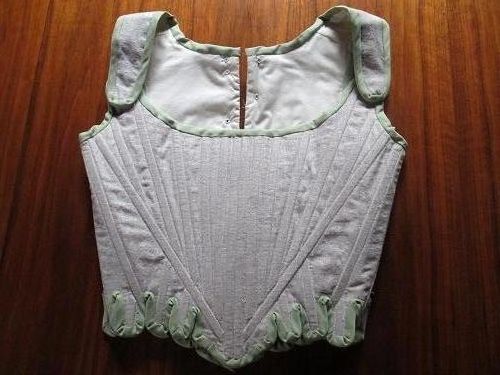
The inside with its muslin lining. I put in the lining after doing the boning channels and putting the panels together, but before doing eyelets and binding. Ashley will only be wearing this corset for a few reenactments a year, so I didn't think she'd need a removable lining.


I hand-sewed 23 eyelets. I actually like doing eyelets, they go fairly quickly (about 5 minutes each for me) and they're pretty satisfying when you do them well. I also got a nice awl out of the deal, so that's great!


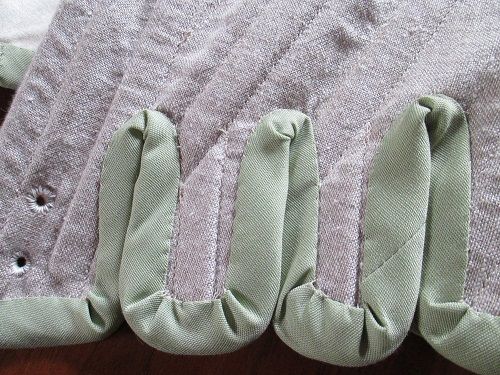
Here's a close-up of my painstaking hand-sewn binding on the tabs! I kept track of my hours on this, and the binding took me almost as long as the entire rest of the corset. Pretty crazy, eh? I watched 3 different PBS programs, 10 Things I Hate About You, and Mean Girls in English and then in French! It was ridiculous. But it looks good! 


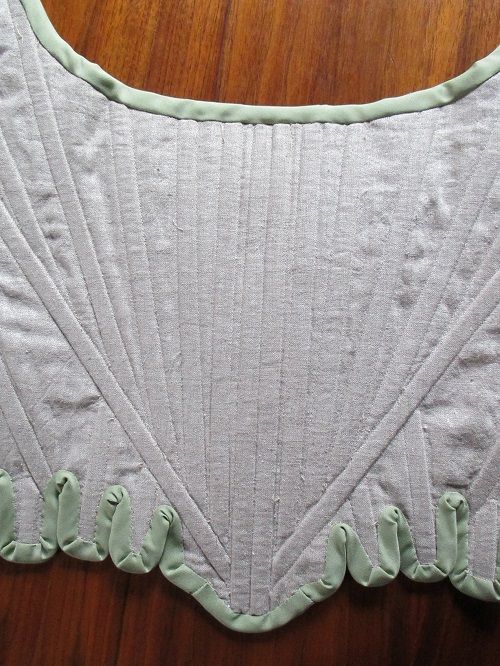
Here's a close-up of the front. For the binding on the top edge of the stays, I machine-sewed it to the front and did the inside by hand. My tip is do the bottom binding first because it makes the top binding seem to go so much faster! 


And guess what! This is my first and possibly only entry in the Dreamstress' Historical Sew Fortnightly!


The Challenge: #13 Lace and Lacings
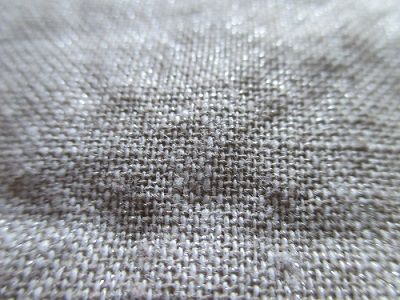
Fabric: The outer fabric is some sort of cotton or linen, I'm not exactly sure, with a bit of a sheen. The inside layers are canvas, and the lining is unbleached muslin. The binding is commercially available bias tape.
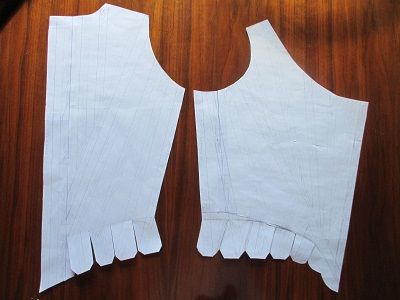
Pattern:  The Diderot Stays pattern, which can be found in Norah Waugh's Corsets and Crinolines but which I found on La Couturiere Parisienne. 
Year: This pattern is accurate to the 1760s/1770s.
Notions: LOTS of  tan Dual Duty thread, some heavy duty thread for eyelets, and cable ties for boning. 
How historically accurate is it? Let's see. The fabric is plausibly historical but not perfect; the bias tape has polyester in it so that's a no. Most of the stitching was done by machine with polyester thread. The binding was mostly hand-sewn, and the eyelets were hand-worked. I'm going to say maybe 70% then.
Hours to complete: 24. No joke. I kept track because it was for someone else and that's how I figure out what to charge them. 
First worn: Since this wasn't for me, I'm not sure, but I think she went to try it on right after she paid me, so... July 23 I would guess!
Total cost: I charged $225 for my work, but I actually didn't spend any money on this because Ashley bought the fabrics and notions for me. So I really don't know. 

This was quite an adventure and I'm glad I got to step away from the usual hemming and mending work people pay me for! 

-Madame Taylor


Beginnings of the Tan Stays

Monday, July 15, 2013

I was thrilled to get a commission from someone who does French and Indian War reenactment and wanted some 18th century stays made for her. Of course I jumped at the chance! When most of my summer sewing work is mending, hemming, making pillows, and other tedious tasks, a historical garment, and one I have experience with nonetheless, was a definite yes! 

So, I drafted a pattern based on Ashley's measurements, with help from La Couturiere Parisienne's helpful guide as well as various scans I found online of the Diderot stays from Corsets and Crinolines (the book is on my wishlist for sure). I messed up a bit in the original patterning and thus on my first set of stays as well: I had assumed the side seams on the pattern were in fact side seams, and drafted my pattern thus. After a little reconsideration and wondering why my pattern didn't look like the original, I realized they're about an inch back from being a true side seam! Luckily I had only cut out a mockup thusfar, and luckily it was really easy to simply chop off an inch of the back piece and tape it to the front. 


Here is a photo of the front pattern piece lying on the heavy duck fabric that I'm using for the inside layers. I made the front point shorter than usual because Ashley said that her reenactments involve more sitting than standing, and I thought that would be more comfortable for her.


The two pattern pieces side-by-side


The fronts all layered together


The backs all layered together


This is my attempt to show off the outer fabric that Ashley picked out. I think it's some sort of rough cotton or possibly linen, but it's got this silvery sheen to it which is quite lovely and quite hard to capture with a camera! (This was also to show off my new camera, which does quite well in natural light especially.)

I already have all the boning channels done but did not have time to take a picture of that yet. The eyelets will be done by hand, as will much of the binding. It is amazing how quickly sewing the boning channels went, compared to doing them by hand! 

This will be my (probably) one and only entry into the Dreamstress' Historical Sew Fortnightly, late I admit, under Lace and Lacing. I will get it done in 2 weeks however, because I'm leaving Vermont next Tuesday! Time for some speed-sewing!

-Madame T

Prom Dresses

Sunday, July 8, 2012

Well, it's been a while. I'm a bad blog owner, I know. But I want to share some things, beginning with my prom dress!

I took inspiration from early 1900's styles, mostly because of the 1912/2012 thing going on this year and all the fashion interwebs going on about the Titanic.

prom front
This dress was fabulous. I patterned the bodice from the laurel dress in Patterns of Fashion 2. The skirt is half an oval and then a wedge. The lavender fabric was this weird polyester stuff that was matte, was heavy but flowed like it was light, and barely frayed at all. I have no idea what it was, but it's great.The bodice is boned with leftover cable ties from my 18th century stays! 
The lace overdress I draped on, it's pretty simple. And the black net, same thing. It didn't come out exactly as planned but I like it. The velvet belt is an heirloom! And I have a wonderful train! prom back I hemmed all of that by hand.

I also made the blue dress in the following pictures. It was a commission from the lovely lady wearing it. It was based on a picture of a dress she found online but couldn't buy. The bodice is from a commercial pattern, and I drafted the rest. She's wearing a large floofy petticoat underneath.
We're all sweaty in this picture, it was taken after three hours of dancing! And she has the tulle overlay gathered up because it was pretty long. two dresses 
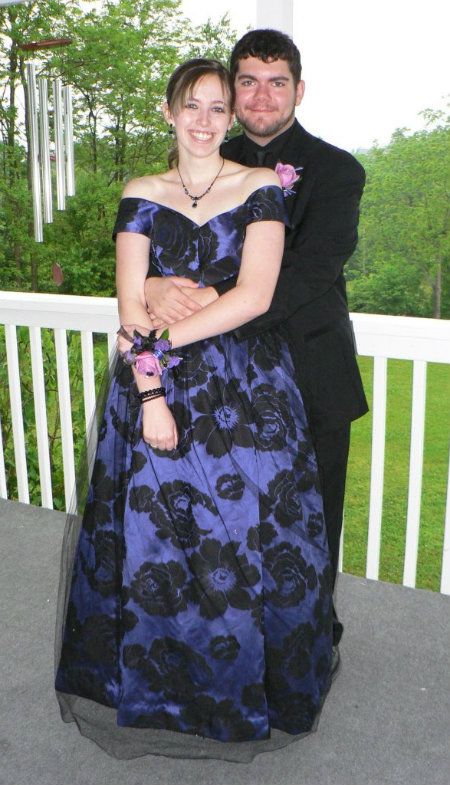
And here she is with her boyfriend. I didn't make his vest. blue
So prom was a lot of fun! I went with like 8 people to this hibachi restaurant beforehand.
Hopefully I can get a post about my graduation dress up before too long!

-Madame Taylor

Howl Jacket Done!

Monday, September 19, 2011

Yes, it's done! I shipped it off on Thursday and Cindy received it on Saturday. She says she loves it!

I don't have too many progress photos but here is one where it's almost done:
Photobucket

And finally, the finished product!

Photobucket

Here are some pictures of my fabulous brother modeling for me:


Photobucket
Photobucket

What a cool kid. So it's in Atlanta now and I am waiting for a check.

In other news, I have been furiously working on my 18th century stays. I'm so sorry that there are no pictures of them yet! By the time I get around to it, they'll probably be done. Oh well.

I wanted to share this game:
It's from Colonial Williamsburg. You have to figure out which clothes go on which social classes. It's quite informative and fun, although I did catch a mistake: someone with no maid would have had to put on her shoes before her stays! :D

-Madame Taylor

 
Madame Tailor - by Templates para novo blogger